The first step is establishing a baseline and center point. This might mean removing old tile or laying down concrete board.
Few walls are plumb and even if they are, tile simply amplifies their imperfections. That’s why it’s important to set up a guide to help you lay square and even rows of tile.
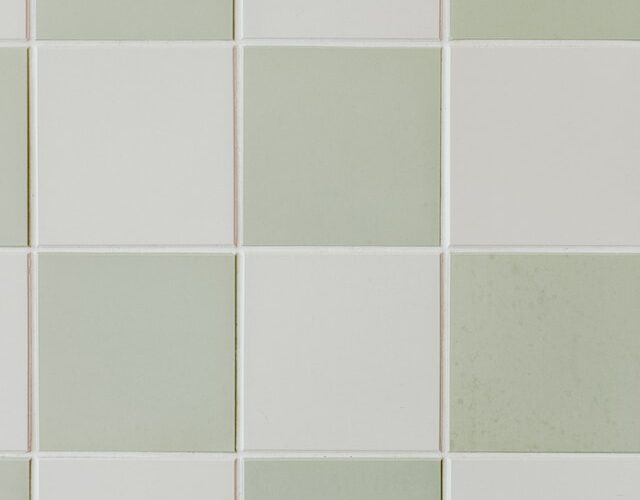
Lay Out Your Tiles
Using an interesting tile layout in your bathroom can elevate design and polish the overall look of the room. But to get the most out of this style technique, it’s important to do a thorough job in the planning stage to ensure smooth installation and an attractive finished product.
Creating accurate layout lines is one of the most important tasks that will help you achieve square and evenly spaced tiles. To do this, run a chalk line between the center points of opposing walls to create a straight line that will serve as your baseline for laying tile. This step should be done even before you begin tiling to establish a reference point for each row of tiles.
It’s also important to ensure that your substrate is sound and will be stable under the weight of the tile. A flexing floor or a sagging wall could lead to broken tiles and grout failure. Regardless of what type of substrate you choose–backer board, plywood or concrete–the surface should be water-resistant to prevent mold and mildew growth.
While many home centers stock all the necessary materials, it’s best to begin with a trip to a dedicated tile showroom where you’ll be more likely to get expert advice and assistance. While you’re there, sketch out your room and jot down dimensions for reference. This will help you determine the exact amount of tiles and supplies you’ll need.
Once you’ve determined the exact dimensions of your room, it’s a good idea to dry-fit your tile pattern (placing them on the ground without adhesive purely to plan the layout). This will give you an opportunity to see how the cut tiles at each end of a row will fit together. If they’re too small, you can shift the layout starting point to accommodate or you can use a wider tile on the ends.
If you’re working on a wall, it’s also a good idea to use a level to establish a top line that’s straight and flush with the ceiling. Few walls are truly plumb or level, so having this line will help you avoid a dizzying “everything’s slightly slanted” look.
Preparing the Surface
The substrate — the surface upon which tile is laid — plays just as important of a role as the tiles themselves. It must be sound, clean and dimensionally stable. For a wall, this means a backer board or cement, and for the floor it can be drywall or plywood. If the underlying material is concrete, it should be pre-treated to ensure proper curing and strength. The substrate must also meet industry standards for tolerance in surface plane irregularity and pitch toward drains or scuppers.
Prior to beginning any work on your bathroom tiling project, you should familiarize yourself with the specific requirements for your particular product and surface. This is to help ensure you understand how your installation process should proceed and comply with the manufacturers printed recommendations and trade and construction work health and safety standards.
When laying tile, it is generally best to start from the center of the room and work your way outward. This helps to keep your lines straight and allows you to minimize the number of cut tiles. You can use a bubble level to determine your center line and snap chalk lines on the floor to guide you as you work.
Before applying any thinset, make sure your tools are in good working order and that you have all the necessary supplies on hand. Some of the most essential tools include a wet saw, a level and a variety of trowel sizes. It is also recommended to wear a respirator mask to protect yourself from any airborne dust that may be generated during the work.
Before starting, it is important to prepare the surface of the wall or floor where you will be tiling by priming it. This will ensure that the bonding agent will properly adhere to the surface. Follow the manufacturer’s instructions on how to prepare the primer for your specific substrate. For example, some gypsum plasters require a sealer while others may need to be primed with a special masonry primer. It is also possible to purchase pre-mixed thinset that eliminates the need to mix the liquid and powder together. This can be a huge time saver but it is still a good idea to read the manufacturer’s recommendations for mixing this product.
Applying Thin-Set Mortar
To adhere your new tile, it must be set in a proper mortar. Traditional thinset is a cement-based mix of sand and Portland cement with water retention agents or activators. It’s available at home improvement stores as a dry mix that you must add water to create a slurry or pre-mixed buckets that are ready to use immediately. Thinset is also sold in a variety of viscosities, ranging from very thick to very runny. It’s important to use the right type of thinset for your project, as different types perform differently on various substrates.
To begin, mark accurate layout lines for your tile installation. Use a chalk line to run a vertical and horizontal line across the room where your center point will be for positioning tile rows. This will ensure that all tiles are installed in straight, even rows and that each tile is evenly spaced.
After the scratch coat dries, apply a second layer of thinset using the notched edge of your trowel. As you spread the mortar, keep a consistent finger pressure throughout the process to avoid lippage, which is where a tile is higher or lower than its neighbors.
If your thinset starts to stiffen, re-wet the surface by running water over it with your sponge. Continue this process as needed to maintain the correct consistency.
Once you’re satisfied with the consistency of your thinset, it’s time to lay your first row of tile. Use your straightedge to guide you as you place each tile, ensuring it’s placed square to the wall. To avoid uneven joints, use tile spacers between each tile as you install them.
Once each tile is in place, use a framing square or A-square to check that it’s level and straight. If it’s not, use a hammer and chisel to tap the tile in place. This helps to set it firmly in the mortar and eliminates the possibility that it will shift and become loose over time. It’s important to do this for every tile that you set, as shifting and crooked tiles can cause the entire floor to look uneven.
Laying the Tiles
Choosing where to begin is the first step in laying bathroom tile. It’s tempting to choose the wall that looks straightest, but you’ll get much better results by starting in the center and working outward. This will help ensure a symmetrical pattern, and it’s much easier to keep track of where you are in the process.
To establish your reference lines for the tile layout, run a chalk line from the center of one wall to the center of the adjacent wall. Then draw a line on the floor that intersects those two points, and use this as your guide. You can also mark out these lines with pencil and a straight edge, but the chalk method is more precise.
Once you’ve marked your reference lines, you can dry-fit a few rows of tiles without mortar to test the layout and make any necessary adjustments. It’s a good idea to include at least a quarter of your overall tile quantity in the dry-fit, because it will give you an accurate sense of how much room you have to work with once you begin to lay the actual mortar.
Before you start laying tile, check that the tile edges are perfectly flush with the wall edges. If you see any gaps, you’ll need to sand the edges down or apply some sort of sealant to prevent moisture from penetrating the surface and causing the wall to crack and chip over time.
Most tiles have directional arrows printed on them that point in the direction they should be installed. If you ignore these arrows, your pattern will look asymmetrical when you’re finished. This is a simple fix, and it will be far less noticeable once your grout has dried.
When you’re ready to install the tile, position a ledger on the floor or tub deck and then set your first row of tiles along it. The leadger should be slightly longer than the full width of your tile, and it’s helpful to place it a few inches back from the edge of the wall. You can create a similar effect by using a piece of wood or other straight board, but the leadger method works much better because it’s easier to control the placement of the tiles and makes it impossible to over-extend your grout lines.